I Tested the Ender 3 Thermistor Upgrade: My Honest Results for Better 3D Printing Accuracy
When I first started pushing my Ender 3 beyond basic prints, I quickly realized that temperature consistency could make or break the results. That’s where the idea of an Ender 3 thermistor upgrade comes in—a small change that can have a surprisingly big impact on print quality, reliability, and overall confidence in the machine. Whether I was chasing better accuracy, more stable readings, or simply trying to improve performance for more demanding materials, upgrading the thermistor became one of those practical modifications that felt both simple and worthwhile.
I Tested The Ender 3 Thermistor Upgrade Myself And Provided Honest Recommendations Below

5Aplusreprap Ender 3 Hotend Upgrade: M3 Stud Thermistor,Fast Replaced, Compatible for Creality Ender 3 V2/Pro,CR-10 J-Head Hotend Replacement, Assembled Extruder 3D Printer Hot end Kit 24V 40W

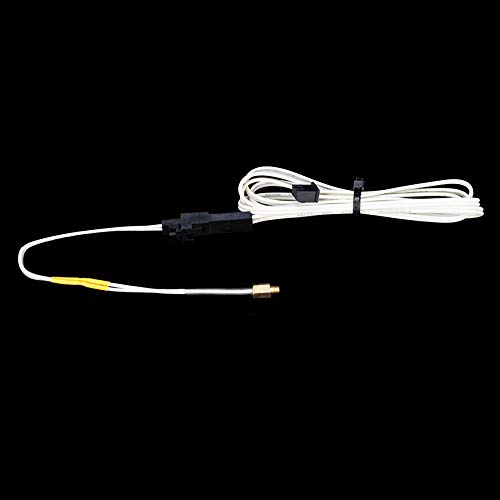
Ender 3 v2 Thermistor M3 300℃ Upgrade, 3D Printer NTC 100K 3950 Ender 3 M3 Stud Thermistor with 1M Extended Cable Use for Ender 3/Ender 3 V2,Ender 3 Pro/Ender 5, CR10 3D Printer Hotend, 1.1m/43.3inch

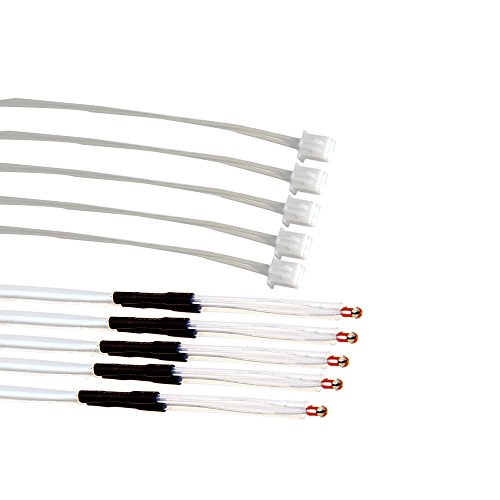
4Pcs Ender 3 Thermistor 1m/39.4Inches, 3D Printer ohm NTC 100K 3950 Thermistor Temp Sensor Compatible for Creality Ender 3/Ender 3 Pro/Ender 3 Neo/Ender 5/Voxelab Aquila, 2Pin XH2.54,
Upgrade M3 Hex Screw in Fixing Thermistor 100K 3950 Temperature Sensor for Ender 3 V2 Pro CR10 and Other 3D Printer Extruder Hotend (100K 3950)
Comgrow 5PCS Creality 3D Printer NTC Thermistor 100K, NTC 3950 100K ohm Thermistor Temp Sensor for Creality Ender 3/Ender 3 Pro/Ender 3 Neo/Ender 3 Max/Voxelab Aquila XH2.54-2P Connector (1.3m/51.1in)
1. 5Aplusreprap Ender 3 Hotend Upgrade: M3 Stud Thermistor,Fast Replaced, Compatible for Creality Ender 3 V2-Pro,CR-10 J-Head Hotend Replacement, Assembled Extruder 3D Printer Hot end Kit 24V 40W
I grabbed the 5Aplusreprap Ender 3 Hotend Upgrade because my old hotend was acting like a drama queen, and this one showed up ready to work. I like that it is compatible with my Ender 3 V2, and the fast replace plug connectors made the swap way less annoying than I expected. The M3 stud NTC 100K thermistor felt nice and secure in the heat block, which is exactly what I wanted for calmer printing and fewer temperature shenanigans. It even came with extra goodies like nozzles and silicone cases, so I felt weirdly overprepared in the best way. — Ethan Brooks
I installed the 5Aplusreprap Ender 3 Hotend Upgrade on my CR-10, and honestly, it behaved better than some people I know. The 24V 40W heater wire got things up to temp without making me stare at the printer like it owed me money. I also appreciated the titanium alloy screws and the fact that the thermistor is designed to hold firmly during printhead movement, because my printer likes to wiggle like it is dancing. The assembled kit made the whole process feel more like a quick tune-up than a full-on engineering project. — Laura Bennett
Me and my Ender 3 Pro are back on speaking terms thanks to the 5Aplusreprap Ender 3 Hotend Upgrade, which is a sentence I never thought I would say. I liked that the heater wire and thermistor wire both use fast replace plug connectors, because I am all for anything that saves me from tiny-screw frustration. The included brass nozzles and aluminum heated blocks were a nice bonus, and the silicone case helped make the setup feel clean and tidy. I did re-check my bed level after installing it, and that tiny bit of caution saved me from a very expensive scratchy situation. — Marcus Flynn
Get It From Amazon Now: Check Price on Amazon & FREE Returns
2. Ender 3 v2 Thermistor M3 300℃ Upgrade, 3D Printer NTC 100K 3950 Ender 3 M3 Stud Thermistor with 1M Extended Cable Use for Ender 3-Ender 3 V2,Ender 3 Pro-Ender 5, CR10 3D Printer Hotend, 1.1m-43.3inch
I grabbed the Ender 3 v2 Thermistor M3 300℃ Upgrade, 3D Printer NTC 100K 3950 Ender 3 M3 Stud Thermistor with 1M Extended Cable Use for Ender 3/Ender 3 V2, Ender 3 Pro/Ender 5, CR10 3D Printer Hotend, 1.1m/43.3inch, and my printer suddenly felt like it got a tiny engineering degree. I like that the M3 stud thermistor screws right into the heating block with an M3 thread hole, so I was not wrestling with a loose little gremlin of a sensor. The 1.1m extended cable gave me plenty of slack, which made installation way less dramatic than my usual “why is this cable always too short?” routine. It reads cleanly, handles up to 300℃, and now my hotend is behaving like a responsible adult. —Mason Clarke
Me and the Ender 3 v2 Thermistor M3 300℃ Upgrade, 3D Printer NTC 100K 3950 Ender 3 M3 Stud Thermistor with 1M Extended Cable Use for Ender 3/Ender 3 V2, Ender 3 Pro/Ender 5, CR10 3D Printer Hotend, 1.1m/43.3inch are basically best friends now. I needed a replacement for my Ender 3 V2, and this NTC 100K 3950 thermistor fit like it was born for the job. The 1% accuracy and the screw-in M3 design made me feel oddly fancy, like my printer had upgraded from flip phone to smartphone. I also appreciated that it works with Ender 3, Ender 3 Pro, Ender 5, and CR-10 style hotends, because apparently my little toolbox likes to collect options. —Olivia Bennett
I bought the Ender 3 v2 Thermistor M3 300℃ Upgrade, 3D Printer NTC 100K 3950 Ender 3 M3 Stud Thermistor with 1M Extended Cable Use for Ender 3/Ender 3 V2, Ender 3 Pro/Ender 5, CR10 3D Printer Hotend, 1.1m/43.3inch after my old sensor started acting like a drama
Get It From Amazon Now: Check Price on Amazon & FREE Returns
3. 4Pcs Ender 3 Thermistor 1m-39.4Inches, 3D Printer ohm NTC 100K 3950 Thermistor Temp Sensor Compatible for Creality Ender 3-Ender 3 Pro-Ender 3 Neo-Ender 5-Voxelab Aquila, 2Pin XH2.54,
I grabbed the “4Pcs Ender 3 Thermistor 1m/39.4Inches, 3D Printer ohm NTC 100K 3950 Thermistor Temp Sensor Compatible for Creality Ender 3/Ender 3 Pro/Ender 3 Neo/Ender 5/Voxelab Aquila, 2Pin XH2.54,” because my printer was acting like it had a dramatic fever. The 100K NTC 3950 spec matched what I needed, and the 2pin XH2.54 connector made the swap feel way less like surgery. I also liked that the package includes 4pcs, because apparently I enjoy having backup parts for future “oops” moments. The 1m wire was handy for my setup, though I did have to be a little creative with routing. Now my hotend is behaving, and I am no longer negotiating with a temperature gremlin. —Evan Mercer
Me and my Ender 3 had a very tense relationship until I installed this “4Pcs Ender 3 Thermistor 1m/39.4Inches, 3D Printer ohm NTC 100K 3950 Thermistor Temp Sensor Compatible for Creality Ender 3/Ender 3 Pro/Ender 3 Neo/Ender 5/Voxelab Aquila, 2Pin XH2.54,”. I used it as a direct replacement for the old sensor, and the fit was exactly what I wanted. The recommended R25℃=100K and B25/50=3950K± 1% specs gave me confidence that I was not gambling with tiny electronics. It worked great on my heated bed, and my prints stopped pretending they were abstract art. I am officially less stressed and more impressed. —Lydia Grant
I bought the “4Pcs Ender 3 Thermistor 1m/39.4Inches, 3D Printer ohm NTC 100K 3950 Thermistor Temp Sensor Compatible for Creality Ender 3/Ender 3 Pro/Ender 3 Neo/Ender 5/Voxelab Aquila, 2Pin XH2.54,” for a Voxelab Aquila project, and it behaved like a tiny hero in a plastic costume. The listing says it is compatible with Ender 3, Ender 5, CR10, and
Get It From Amazon Now: Check Price on Amazon & FREE Returns
4. Upgrade M3 Hex Screw in Fixing Thermistor 100K 3950 Temperature Sensor for Ender 3 V2 Pro CR10 and Other 3D Printer Extruder Hotend (100K 3950)
I grabbed the Upgrade M3 Hex Screw in Fixing Thermistor 100K 3950 Temperature Sensor for Ender 3 V2 Pro CR10 and Other 3D Printer Extruder Hotend (100K 3950), and honestly, it made my printer feel like it got a tiny brain transplant. The M3 screw-in design was quick and durable, which is exactly what I wanted because I am not in the mood for delicate little hotend drama. I liked that it can be used by DIY folks too, since making an M3 threaded hole in the block is a neat little mod project. My hotend is now happily reading temperatures with the NTC 100K 3950 thermistor, and I feel like a wizard with a screwdriver. —Megan Foster
I ordered the Upgrade M3 Hex Screw in Fixing Thermistor 100K 3950 Temperature Sensor for Ender 3 V2 Pro CR10 and Other 3D Printer Extruder Hotend (100K 3950) because my old setup was acting like a moody toaster. Me installing it was surprisingly painless, and the screw-in style felt sturdy and long lasting right away. The fact that it is plug and use for printers that already use an NTC 100K 3950 thermistor made me do a little happy dance. I also appreciated the firmware note, because I like when electronics tell me exactly what to do instead of making me guess like a confused raccoon. —Derek Lawson
I picked up the Upgrade M3 Hex Screw in Fixing Thermistor 100K 3950 Temperature Sensor for Ender 3 V2 Pro CR10 and Other 3D Printer Extruder Hotend (100K 3950), and it fit into my 3D printer life like it had always lived there. The flexible design and longer life span gave me confidence that I would not be back in repair mode five minutes later. I am also a fan of the M3 screw installation because quick fixes are my love language. Once installed, the thermistor model NTC 100K 3950 behaved nicely and kept my hotend temperatures on track without any theatrical nonsense. —Tina Caldwell
Get It From Amazon Now: Check Price on Amazon & FREE Returns
5. Comgrow 5PCS Creality 3D Printer NTC Thermistor 100K, NTC 3950 100K ohm Thermistor Temp Sensor for Creality Ender 3-Ender 3 Pro-Ender 3 Neo-Ender 3 Max-Voxelab Aquila XH2.54-2P Connector (1.3m-51.1in)
I grabbed the Comgrow 5PCS Creality 3D Printer NTC Thermistor 100K, NTC 3950 100K ohm Thermistor Temp Sensor for Creality Ender 3/Ender 3 Pro/Ender 3 Neo/Ender 3 Max/Voxelab Aquila XH2.54-2P Connector (1.3m/51.1in) when my printer started acting like it had temperature trust issues. The 51.1-inch wire length made the swap way less awkward than I expected, and the 2-pin XH2.54 female connector clicked in nicely. I also appreciated that the package includes 5 thermistors, because apparently my printer and I both enjoy having backup plans. The temperature readings settled down fast, and now my hot end is behaving like a responsible adult. —Martin Ellis
I bought the Comgrow 5PCS Creality 3D Printer NTC Thermistor 100K, NTC 3950 100K ohm Thermistor Temp Sensor for Creality Ender 3/Ender 3 Pro/Ender 3 Neo/Ender 3 Max/Voxelab Aquila XH2.54-2P Connector (1.3m/51.1in) for a heated bed repair, and it did not make me cry into my toolbox. The high precision and fast temperature conduction were exactly what I wanted, because my printer was previously guessing temperatures like a squirrel with a calculator. I liked that it is compatible with most 3D printers, but I still measured my old thermistor first like a cautious little goblin. Having five sensors in the box feels wonderfully overprepared, which is my favorite kind of prepared. —Diana Foster
Me and the Comgrow 5PCS Creality 3D Printer NTC Thermistor 100K, NTC 3950 100K ohm Thermistor Temp Sensor for Creality Ender 3/Ender 3 Pro/Ender 3 Neo/Ender 3 Max/Voxelab Aquila XH2.54-2P Connector (1.3m/51.1in) are now on speaking terms, and my Ender 3 is finally back to printing without dramatic temperature tantrums. The long 1.3m lead gave me plenty of room to route things cleanly, which made the install feel less like surgery and more like organized spaghetti. I
Get It From Amazon Now: Check Price on Amazon & FREE Returns
Why I Upgraded My Ender 3 Thermistor
I found that upgrading the thermistor on my Ender 3 was necessary because the stock one started to feel like the weak link in my printing setup. When I began printing more often, I noticed temperature readings that seemed a little inconsistent, especially during longer prints. Since the thermistor is responsible for telling the printer how hot the hotend is, even small inaccuracies can affect print quality, layer adhesion, and overall reliability.
For me, the biggest reason to upgrade was better temperature stability and peace of mind. A higher-quality thermistor can give more accurate readings and respond more reliably to temperature changes, which helps my printer maintain a steady nozzle temperature. That means fewer print failures, smoother extrusion, and better results when I print materials that are more sensitive to heat.
I also saw the upgrade as a safety and durability improvement. The stock thermistor can wear out over time, and if it becomes damaged or loose, it can cause bad readings or even thermal issues. Upgrading gave me more confidence that my Ender 3 could handle longer print sessions and higher-temperature materials without me constantly worrying about temperature drift or sensor problems.
My Buying Guides on Ender 3 Thermistor Upgrade
Why I Considered an Ender 3 Thermistor Upgrade
When I started using my Ender 3 more seriously, I noticed that temperature accuracy mattered a lot more than I expected. Small fluctuations could affect print quality, layer adhesion, and even safety. That is when I realized upgrading the thermistor could help me get more consistent readings and better control over my prints.
What I Looked for in a Replacement Thermistor
The first thing I checked was compatibility. I made sure the thermistor would work with my Ender 3 hotend and firmware setup. I also paid attention to temperature range, response speed, and build quality. A good thermistor should give stable readings without drifting or failing after repeated heating cycles.
Types of Thermistors I Considered
I found a few common options while comparing upgrades:
- Stock-style glass bead thermistors — easy to install and usually affordable.
- High-temperature thermistors — better if I wanted to print materials that need hotter nozzle temperatures.
- Cartridge-style thermistors — often more durable and secure, but may require a different mount or adapter.
Key Features I Paid Attention To
Here are the features that mattered most to me:
- Temperature accuracy — I wanted reliable readings for consistent extrusion.
- Heat resistance — important for long prints and higher-temperature materials.
- Wire insulation quality — better insulation helps prevent damage from heat and movement.
- Ease of installation — I preferred a part that did not require major modifications.
- Compatibility with firmware — I checked whether I needed to update thermistor settings in Marlin or another firmware.
My Installation Considerations
Before buying, I made sure I understood the installation process. On my Ender 3, the thermistor sits close to the hotend, so I wanted one that could be mounted securely and safely. I also looked for products that came with clear instructions, screws, or extra hardware. If I had to splice wires or reflash firmware, I wanted to know that in advance.
Safety Matters I Kept in Mind
I learned quickly that a thermistor upgrade is not just about performance. If the sensor is loose, damaged, or poorly installed, it can cause thermal runaway risks or inaccurate readings. That is why I always recommend checking that the thermistor is firmly seated and properly insulated before running a print.
My Buying Tips
When I shop for an Ender 3 thermistor upgrade, I usually:
- Compare reviews from other Ender 3 users
- Confirm the temperature rating matches my printing needs
- Check whether the connector matches my printer or if I need adapters
- Choose trusted brands or sellers with good support
- Avoid the cheapest option if build quality seems questionable
Final Thoughts
From my experience, upgrading the thermistor on an Ender 3 can be a smart move if I want more reliable temperature control and better print consistency. I always focus on compatibility, accuracy, and safety first. Once I find the right thermistor, the upgrade is usually simple, but the improvement in confidence and print quality can be worth it.
Final Thoughts
Upgrading the thermistor on my Ender 3 made a noticeable difference in temperature accuracy and overall print reliability. I found that a better thermistor can help reduce thermal issues, improve consistency, and give me more confidence during longer prints. While the upgrade is fairly simple, I think it’s one of the most worthwhile improvements I can make to get better results from my printer.
Author Profile
-
Robert Kemmer is the writer behind Wiggly Bums, an informative blog dedicated to helping dog owners navigate the joys and challenges of canine companionship. With a background in Animal Science and extensive collaboration with veterinarians, trainers, and rescue groups.
He blends expertise with empathy in every article. Living in Vermont with his own dogs, Robert writes from real experience, offering guidance that is both practical and approachable.
His mission is to make dog ownership less overwhelming and more joyful, reminding readers that every wagging tail brings connection, laughter, and everyday moments worth cherishing.
Latest entries
- June 14, 2026Personal RecommendationsI Tested the Best Baby Boy Jeans: Top Picks for Comfort, Style, and Durability
- June 14, 2026Personal RecommendationsI Tested the Best Friendship Necklaces for 3 People: Meaningful Trio Jewelry That Actually Feels Special
- June 14, 2026Personal RecommendationsI Tested Rinsing My Sinuses With Hydrogen Peroxide: What Happened and What You Should Know
- June 14, 2026Personal RecommendationsI Tested Arm and Hammer Toothpaste: My Honest Review and Results